Custom Web Part Header Chrome Colors defined in the Page Layout in SharePoint 2010

When creative designers a web design for a SharePoint site, one of the most common design traits for web parts is custom headers.

SharePoint though doesn’t offer much flexibility in customizing the Out-of-the-Box (OOB) web part header chrome for each web part.

Typically a SharePoint UI Developer will over-ride the OOB CSS for a web part header and apply a global style that makes it look better then it would without the custom style.

The problem though is that every web part in the entire site collection will now have the exact same customized style applied.

You could create a number of different web part header styles and scope the css styles to certain web part zones or zone DIV wrappers. This approach, while completely acceptable if the requirements allow for it, seems to me to be a bit restrictive.

In this blog post, we are going to show how we can allow the user to define the web part header color at the page level. This will force every web part on a page to have the same header color, BUT it will allow the user the flexibility to define a different header color for each individual page in the site. We will also make the list of colors available list driven, so the selection of colors is easily managed.

For purposes of simplicity, we will simply provide the user the ability to change the background color of the header. In a future revision, I will attempt to allow the user to define and insert custom HTML to entirely change the look and feel of the headers at the page level.

SOLUTION

The solution is a series of steps defined in the following list:

  1. Setup the global web part header color
  2. Create the list of available colors for the web part header
  3. Create a custom Site Column
  4. Add custom Site Column to the appropriate Content Type(s)
  5. Reference the Site Column in the Page Layout
  6. Create the jQuery to apply the custom color
1. The first step is to provide in our custom CSS file a global background color that will be applied to all web part headers site wide. This is put into place to ensure if something goes wrong with our solution, we have a default color applied to all web parts.
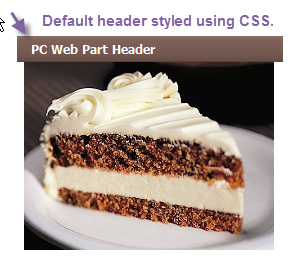
Default web part header style defined in global CSS

2. A custom list is used to provide the list of available colors. This also allows the user to easily maintain, edit, add, delete the list of colors that is available to the user editing the page. The list only needs two columns, one column to hold the name of the color and a second column named “HexValue” to hold the HEX value of the color. For the demo, our list name is “Web Part Header Colors”.
List settings for custom list “Web Part Header Colors”

3. Once the list has been created, we will create a custom Site Column that will reference the Color Title and Color HEX value that we are storing in the list that was created in step 2. The column type should be “Lookup” and the name we will use is “WPHeaderColor”.

Site Column settings – Screenshot 1
In the section entitled “Additional Column Settings”, we need to set the following properties:

Site Column settings – Screenshot 2
This will create what appears to be a single column, although SharePoint actually creates two columns that are tied together behind the scenes, which we will see in more detail when we add the columns to our Page Layout in step 5.
4. The “WPHeaderColor” Site Column will need to be added to the appropriate page layouts where we would like to implement this feature. Every page layout has an associated content type, so we want to ensure that the Site Column is added to all relevant Content Types that our Page Layout(s) are connected to. For our demo, we are simply adding the Site Column to the “Welcome Page” Content Type as defined in the screenshots below.

In Site Settings, select “Site content types” and
then locate the “Welcome Page” content type

On the Welcome Page content type information page, select
the “Add from existing site columns” link in the “Columns” section

On the “Add Columns to Content Type” screen, select “Custom Columns”
from the drop-down list and select the “WPHeaderColor” column, click Add
and then click OK.
5. Now that the site column has been added to the Content Type(s), we need to setup in the Page Layout how the user will define the background color to applied to the web part header.
As we outlined above, our new “WPHeaderColor” Site Column in the browser appears to be a single column.

The “WPHeaderColor” site column has been
added to the “Welcome Page’ content type and
appears to be a single column.
When viewed within SharePoint Designer though, we can see that there are actually two columns. One for the main “WPHeaderColor” column, which is connected to the “Title” list column and another column for the “HexValue” list column. This somewhat hidden Site Column is entitled “WPHeaderColor:HexValue”.
SharePoint Designer shows that
two columns have been created
“WPHeaderColor:HexValue” was automatically created by SharePoint and connected to the “WPHeaderColor” Site Column that we setup in step 3 above.
The plan is to provide the “Title” list column or “WPHeaderColor” Site Column in the form of a drop-down menu. This will allow the user to select a color using a real world name for the color, such as Black, White, Purple, etc.
We will utilize a SharePoint “EditModePanel” to store the drop-down of the color Title. This will allow the user to select and modify the dropdown when it edit mode on the page, but the drop-down will not be visible when the page has been published.
    <PublishingWebControls:EditModePanel runat="server" id="EditModePanel">	<div class="PC-Global-EditModePanel-Wrapper">                <SharePointWebControls:LookupField FieldName="4339bdb8-835d-4be1-83f8-c2afda574f97" runat="server">		</SharePointWebControls:LookupField>	</div></PublishingWebControls:EditModePanel>
EditModePanel Code in the bottom of our Page Layout
“If the color choice is only visible when in edit mode, how will the color be applied to the header when the page is published???”, you might be thinking. Great Question!!
This is where the “WPHeaderColor:HexValue” hidden Site Column will be utilized.
We will use a <SharePointWebControl:FieldValue> control to provide the Hex color value when in published mode.
In this demo, I have placed a <DIV> container just inside of my “PlaceHolderMain” Content Place Holder in the Page Layout. This DIV will hold the <SharePointWebControl:FieldValue> control for the “WPHeaderColor:HexValue” Site Column.
<asp:Content ContentPlaceholderID="PlaceHolderMain" runat="server"><div class="PC-Global-WebPartHeaderColor-PageLayout-Wrapper"> <SharePointWebControls:FieldValue FieldName="2a13abe0-7a66-41ed-8d40-cc41e0cd1507" runat="server"></SharePointWebControls:FieldValue></div>
HTML to provide the Hex Value for use with jQuery

We will use CSS to hide the display of this control to the user, but the value of the control, which is the HEX Color Value of the chosen color in the drop-down located in the “EditModePanel”, will be accessible for us to capture with jQuery in step 6.

    .PC-Global-WebPartHeaderColor-PageLayout-Wrapper { display:none;}

Because the “WPHeaderColor” and “WPHeaderColor:HexValue” site columns are tied together and are being populated from our “Web Part Header Colors” list, when we select a color in the drop-down (which is the “WPHeaderColor” site column) within our “EditModePanel”, upon refresh of the page, we are also capturing and storing on the page the corresponding Hex color value stored in the list.
Now, when we edit the page, select a color from the drop-down menu within our “EditModePanel” and publish the page, we can see the corresponding HexValue is being displayed at the top of our page content.
EditModePanel when editing the page displays
the color values from our “Web Part Header Colors” list

6. With our chosen color HexValue now on our page, we can utilize jQuery to capture the value and apply it as a background color to our web part headers. While we hid the display of the HexValue, it is still located in the HTML and accessible via jQuery.

SharePoint brings back the HexValue in the form of an <A> linked to the list item. With this knowledge, we create the following jQuery to capture the Hex value and apply it to all visible OOB web part headers on the page:
    $(document).ready(function () {    var WPHeaderColor = $('.PC-Global-WebPartHeaderColor-PageLayout-Wrapper a').text();    if (WPHeaderColor != '') {        $('tr.ms-WPHeader').css('background-color', '#' + WPHeaderColor);    }});
RESULTS

The end result allows the user to define page-by-page throughout the SharePoint application custom colors for their web part headers. This is a simple, but typically well received feature by many users looking to add a touch of customization on each page.

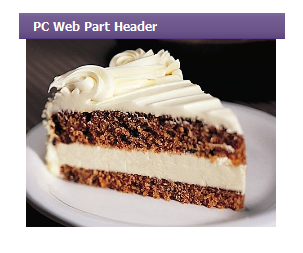
After selecting Purple in the drop-down and saving the page,
we can see the web part header color has been updated
As you can see in the above screenshot, after we selected Purple from the dropdown menu and saved the page, our web part header color has been updated to reflect the Purple Hex value that was populated in our “Web Part Header Color” list.

Share:

Author: David Warner II

Leave a Reply

Your email address will not be published. Required fields are marked *

This site uses Akismet to reduce spam. Learn how your comment data is processed.