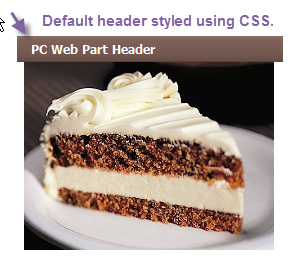
When creative designers a web design for a SharePoint site, one of the most common design traits for web parts is custom headers.
SharePoint though doesn’t offer much flexibility in customizing the Out-of-the-Box (OOB) web part header chrome for each web part.
Typically a SharePoint UI Developer will over-ride the OOB CSS for a web part header and apply a global style that makes it look better then it would without the custom style.
The problem though is that every web part in the entire site collection will now have the exact same customized style applied.
You could create a number of different web part header styles and scope the css styles to certain web part zones or zone DIV wrappers. This approach, while completely acceptable if the requirements allow for it, seems to me to be a bit restrictive.
In this blog post, we are going to show how we can allow the user to define the web part header color at the page level. This will force every web part on a page to have the same header color, BUT it will allow the user the flexibility to define a different header color for each individual page in the site. We will also make the list of colors available list driven, so the selection of colors is easily managed.
For purposes of simplicity, we will simply provide the user the ability to change the background color of the header. In a future revision, I will attempt to allow the user to define and insert custom HTML to entirely change the look and feel of the headers at the page level.
SOLUTION
The solution is a series of steps defined in the following list:
- Setup the global web part header color
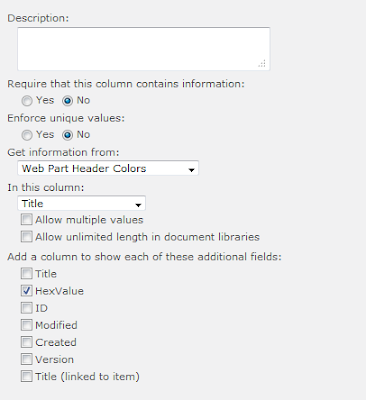
- Create the list of available colors for the web part header
- Create a custom Site Column
- Add custom Site Column to the appropriate Content Type(s)
- Reference the Site Column in the Page Layout
- Create the jQuery to apply the custom color
 |
| Site Column settings – Screenshot 1 |
| In Site Settings, select “Site content types” and then locate the “Welcome Page” content type |
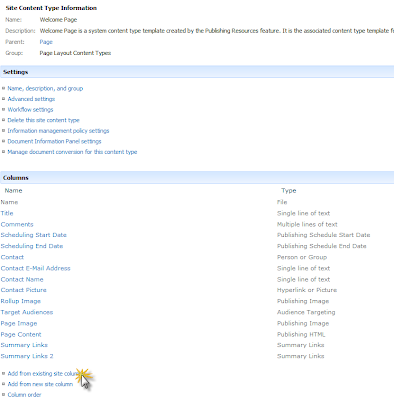 |
| On the Welcome Page content type information page, select the “Add from existing site columns” link in the “Columns” section |
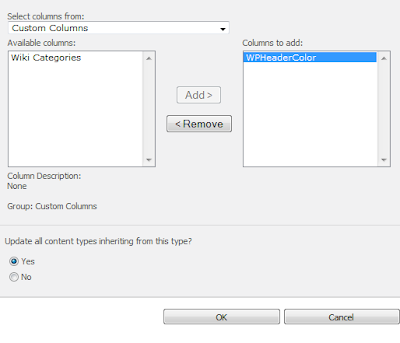 |
| On the “Add Columns to Content Type” screen, select “Custom Columns” from the drop-down list and select the “WPHeaderColor” column, click Add and then click OK. |
 |
| The “WPHeaderColor” site column has been added to the “Welcome Page’ content type and appears to be a single column. |
<PublishingWebControls:EditModePanel runat="server" id="EditModePanel"> <div class="PC-Global-EditModePanel-Wrapper"> <SharePointWebControls:LookupField FieldName="4339bdb8-835d-4be1-83f8-c2afda574f97" runat="server"> </SharePointWebControls:LookupField> </div></PublishingWebControls:EditModePanel>
<asp:Content ContentPlaceholderID="PlaceHolderMain" runat="server"><div class="PC-Global-WebPartHeaderColor-PageLayout-Wrapper"> <SharePointWebControls:FieldValue FieldName="2a13abe0-7a66-41ed-8d40-cc41e0cd1507" runat="server"></SharePointWebControls:FieldValue></div>
 |
| HTML to provide the Hex Value for use with jQuery |
We will use CSS to hide the display of this control to the user, but the value of the control, which is the HEX Color Value of the chosen color in the drop-down located in the “EditModePanel”, will be accessible for us to capture with jQuery in step 6.
.PC-Global-WebPartHeaderColor-PageLayout-Wrapper { display:none;}
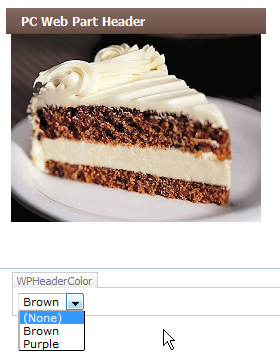 |
| EditModePanel when editing the page displays the color values from our “Web Part Header Colors” list |
6. With our chosen color HexValue now on our page, we can utilize jQuery to capture the value and apply it as a background color to our web part headers. While we hid the display of the HexValue, it is still located in the HTML and accessible via jQuery.
$(document).ready(function () { var WPHeaderColor = $('.PC-Global-WebPartHeaderColor-PageLayout-Wrapper a').text(); if (WPHeaderColor != '') { $('tr.ms-WPHeader').css('background-color', '#' + WPHeaderColor); }});
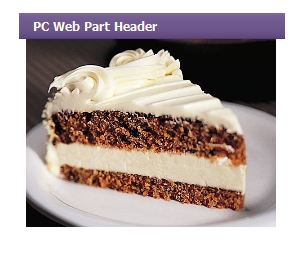 |
| After selecting Purple in the drop-down and saving the page, we can see the web part header color has been updated |


